
Arena tactics
Ex Sanguis Environmental Combos and Positioning
Ex Sanguis arenas are tactical systems. The official store page calls out explosive objects, ignitable elements and line-of-sight play alongside knockbacks, forced facing and flanking. These mechanics become reliable when you separate setup from trigger and judge the board that remains after the effect.
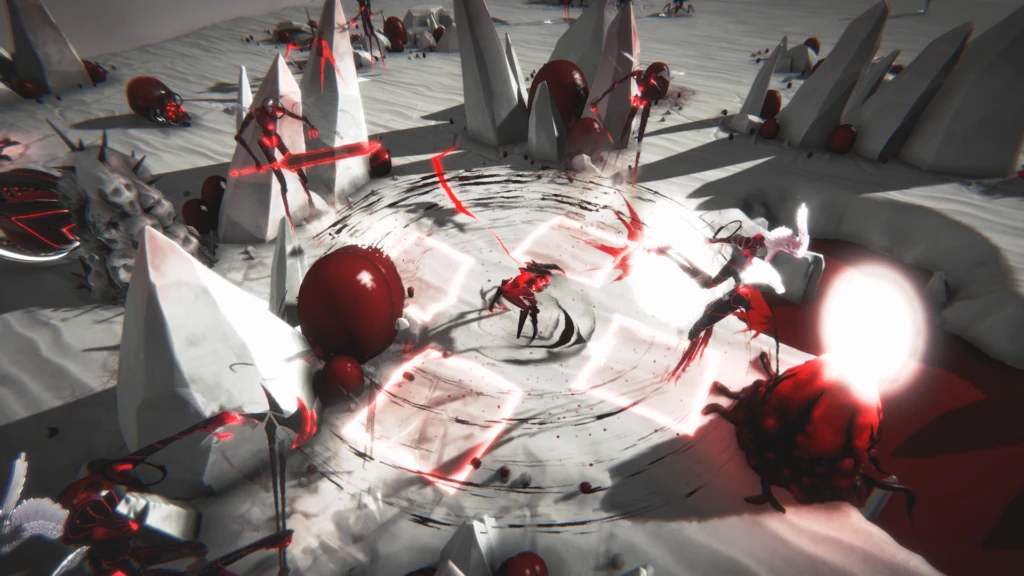
Scan the arena before opening a skill menu
Begin with geometry. Mark hazards, narrow lanes, cover, explosive clusters and safe squares. Then locate which enemies can be moved and which allied positions would be exposed by the movement. This scan reveals opportunities that raw damage comparison misses.
An environmental opportunity is valuable when it combines jobs: damaging several targets, breaking a sight line, forcing a better facing angle or saving AP that would otherwise be spent on separate attacks.
Position first, trigger second
The safest combo order is alignment, clearance, trigger. Alignment puts the important target or group into the effect. Clearance moves allies outside the danger and preserves their next action. The trigger resolves only after both are confirmed.
Reversing the order wastes the asset. Triggering an explosive before the second enemy is moved into range may trade a multi-target solution for a small hit. Moving an ally after the trigger may cost the very action the hazard was meant to save.
Knockback should change two things
Good knockback changes the target’s location and the tactical relationship around it. It may move an enemy beside an explosive, break its line of sight, expose a flank or remove it from a route. If displacement creates no second advantage, compare it with a direct control or damage option.
Also inspect the destination. A pushed enemy may gain a new line on a vulnerable Stilla or land closer to a future objective. The animation is not the result; the post-move board is.
Repulsion Nexus, Grasping Vines and Pustulae
The Voice of Uriel adds the Repulsion Nexus and Grasping Vines alongside explosive Pustulae. Use the tile and ability previews to plan around the actual layout of the encounter. The Voice of Uriel
- Repulsion Nexus. Before committing to a displacement near the Nexus, check the destination and the firing lanes that will open. If the enemy would land with a line on your weakest Stilla, move that Stilla first or choose a different setup.
- Grasping Vines. Check the route before spending the movement that gets a Stilla into range. If your follow-up depends on passing the same tile again, choose a second route or keep a control action available to buy time.
- Pustulae. Check friendly clearance before triggering a blast. Around Carnalus, include the Pustula inside the area attack in your safe-tile check. Hotfix #5 fixed its missing explosion. Hotfix #5
Magnetic Pulse pulls. Older builds could show push feedback even though the move pulled. Use the corrected preview to check the landing tile. If you’re trying to line an enemy up beside a Pustula, place the caster so the pull ends on the safe side of the blast for the squad.
Forced facing creates safety and offense
Facing effects are easy to treat as damage setup, but their defensive value can be just as important. Turning an enemy away from a wounded character can protect the next activation while opening a flank for another unit. This double value is ideal in a resource-limited turn.
Plan facing before the follow-up character moves. Otherwise the follow-up may occupy the wrong side or block a cleaner route.
Line of sight is a control tool
Breaking sight can deny an enemy’s preferred action without defeating it. It can also let the squad spend the current window on a higher-priority target. Look for obstacles, angles and movement routes that protect more than one character.
Do not assume that hiding one Stilla solves the threat. Re-evaluate the enemy’s alternative targets and path. A sight-line plan is successful only if the redirected behavior remains acceptable.
Fire and explosions need an exit plan
Area effects can change routes as well as health. Before ignition or detonation, check where the squad will stand after the effect, which paths remain available, and who acts next. A strong initial blast can still be a bad trade if it traps the team or hands the next enemy a clear angle.
Environmental effects are best used inside a timeline window. Delay the relevant enemy, arrange the targets, trigger the chain, then use remaining actions to recover formation.
A compact arena checklist
Find the hazard. Choose the target. Verify that displacement is possible. Confirm friendly clearance. Read the timeline. Trigger the effect. Inspect the new lines of sight and facing. Preserve enough AP or movement to handle the next actor.
When no environmental option satisfies that sequence, do not force one. The arena is an available tool, not a quota. A simple interrupt or safe reposition can be the stronger play.
Continue with the timeline guide to create space for setup or the complete combat guide to combine arena control with AP and Burst Mode.
During Survival, use terrain to keep one safe route open as new waves arrive.